SSO Configuration
Single Sign-On (SSO) allows users in your company to log in to the GameBench Web Dashboard using your identity provider (IdP) instead of a separate password.
Requirements
- You need the Manage Company permission to configure SSO.
Navigating to SSO Settings
- Click your email address in the top-right corner and select My Company.
- Click the SSO tab.
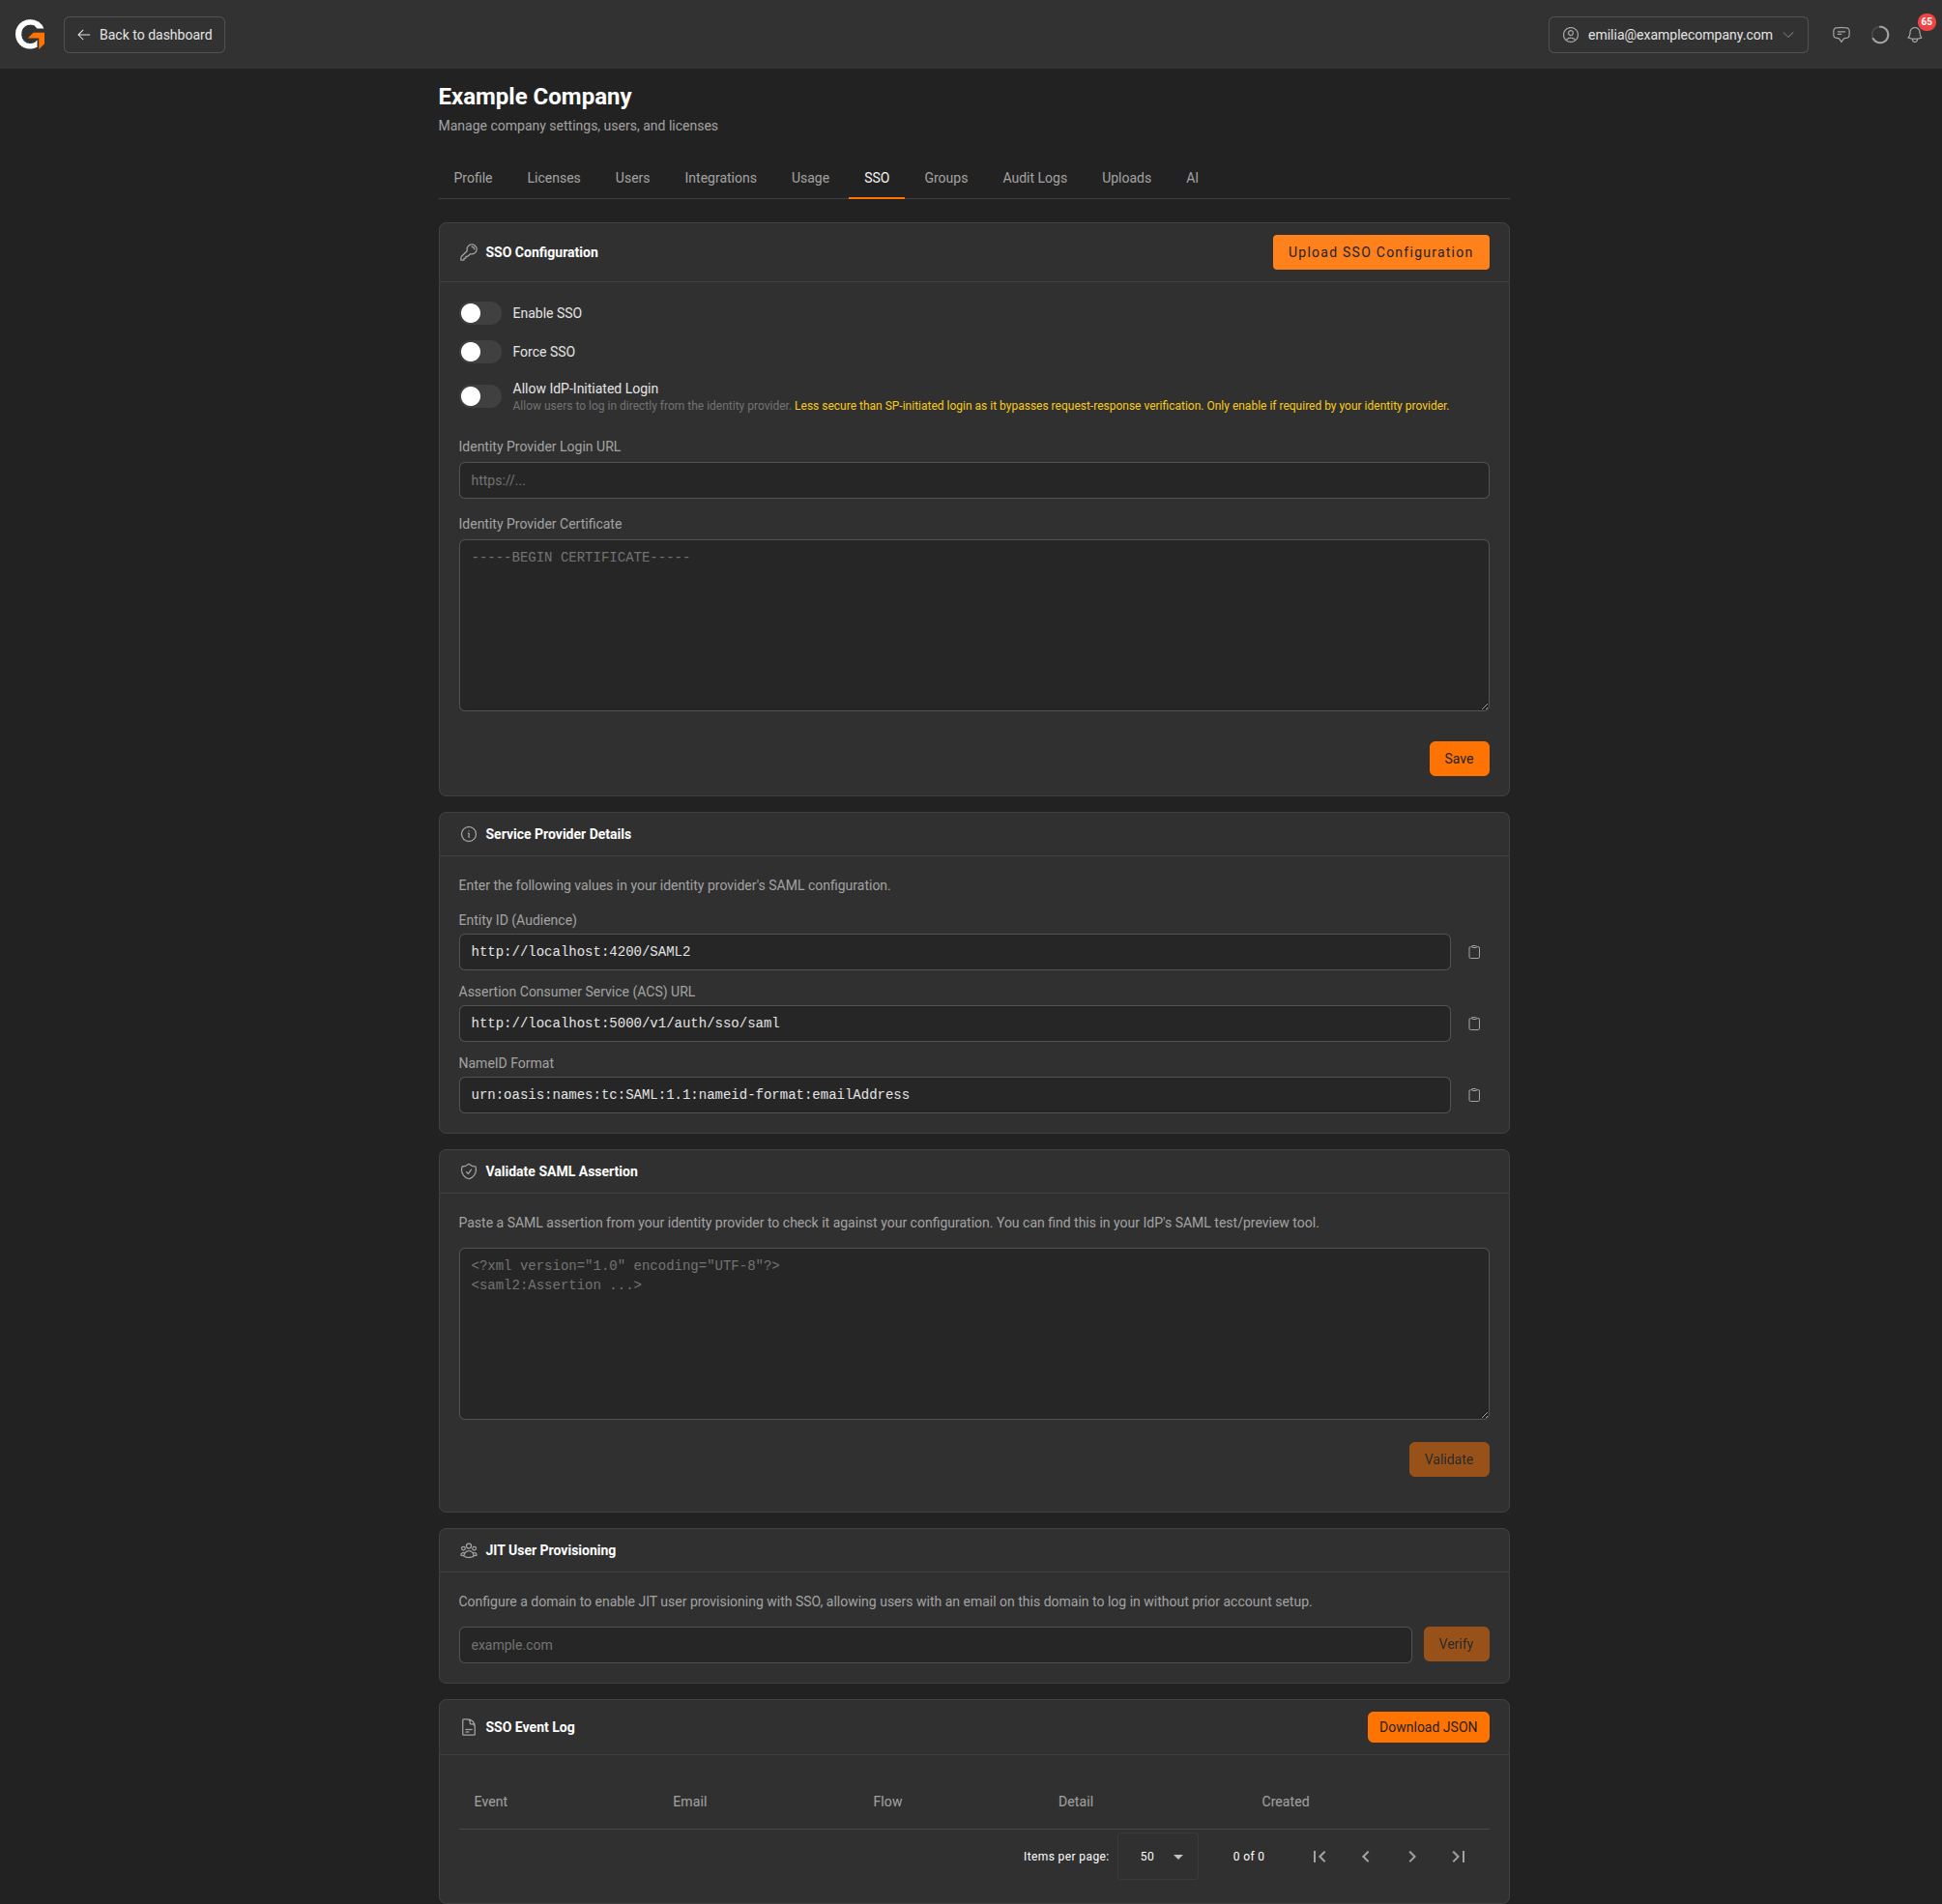
SSO Configuration
The SSO Configuration section provides the following options:
- Enable SSO – Turns on SSO login for your company.
- Force SSO – When enabled, all users must log in via SSO (password login is disabled).
- Allow IdP-Initiated Login – Allows users to log in directly from the identity provider. Less secure than SP-initiated login as it bypasses request-response verification.
Below these toggles, enter:
- Identity Provider Login URL – The SSO login URL provided by your IdP.
- Identity Provider Certificate – The X.509 certificate from your IdP (in PEM format).
You can also upload your SSO configuration using the Upload SSO Configuration button.
Click Save to apply your changes.
Service Provider Details
This section displays the values you need to enter in your identity provider’s SAML configuration:
| Field | Value |
|---|---|
| Entity ID (Audience) | https://web.gamebench.net/SAML2 |
| Assertion Consumer Service (ACS) URL | https://web.gamebench.net/v1/auth/sso/saml |
| NameID Format | urn:oasis:names:tc:SAML:1.1:nameid-format:emailAddress |
Each value has a Copy button for convenience.
Validate SAML Assertion
Use this section to test your SSO configuration before going live. Paste a SAML assertion from your identity provider’s test/preview tool and click Validate to check it against your configuration.
JIT User Provisioning
Just-In-Time (JIT) user provisioning allows users with an email on a verified domain to log in via SSO without prior account setup. Enter your domain (e.g., example.com) and click Verify to enable this feature.
SSO Event Log
The event log shows a history of SSO login events for your company, including the event type, user email, flow (SP or IdP-initiated), and details. Click Download JSON to export the log.
Appendix: Okta Integration Example
The following walkthrough shows how to configure SSO using Okta as the identity provider.
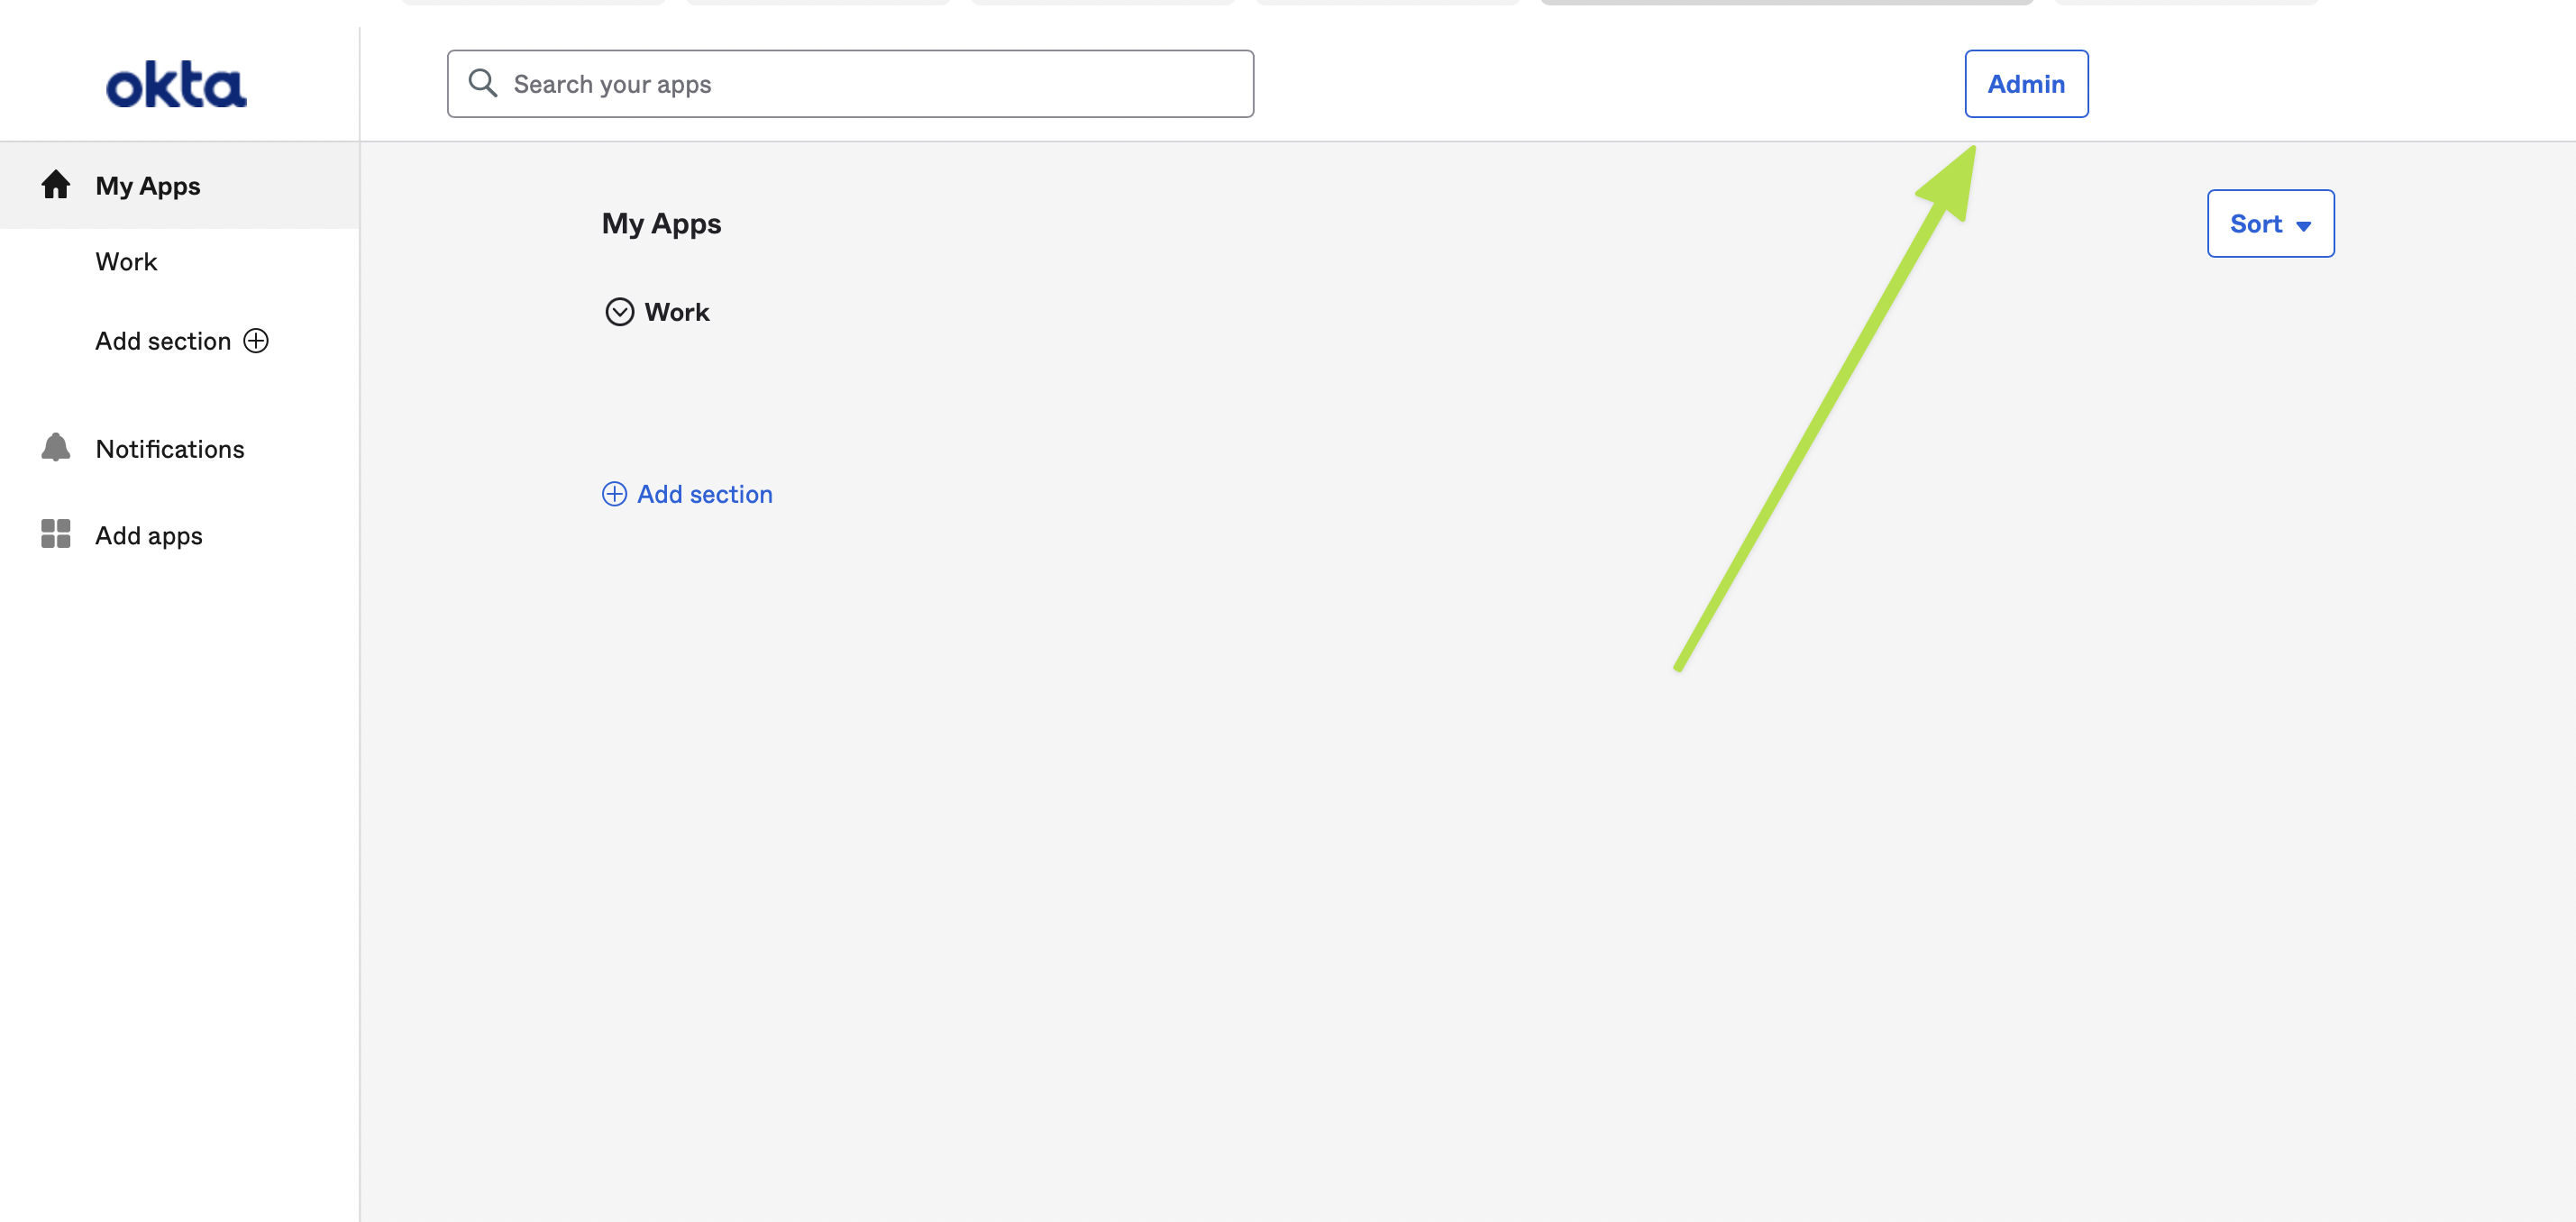
1. Navigate to Admin
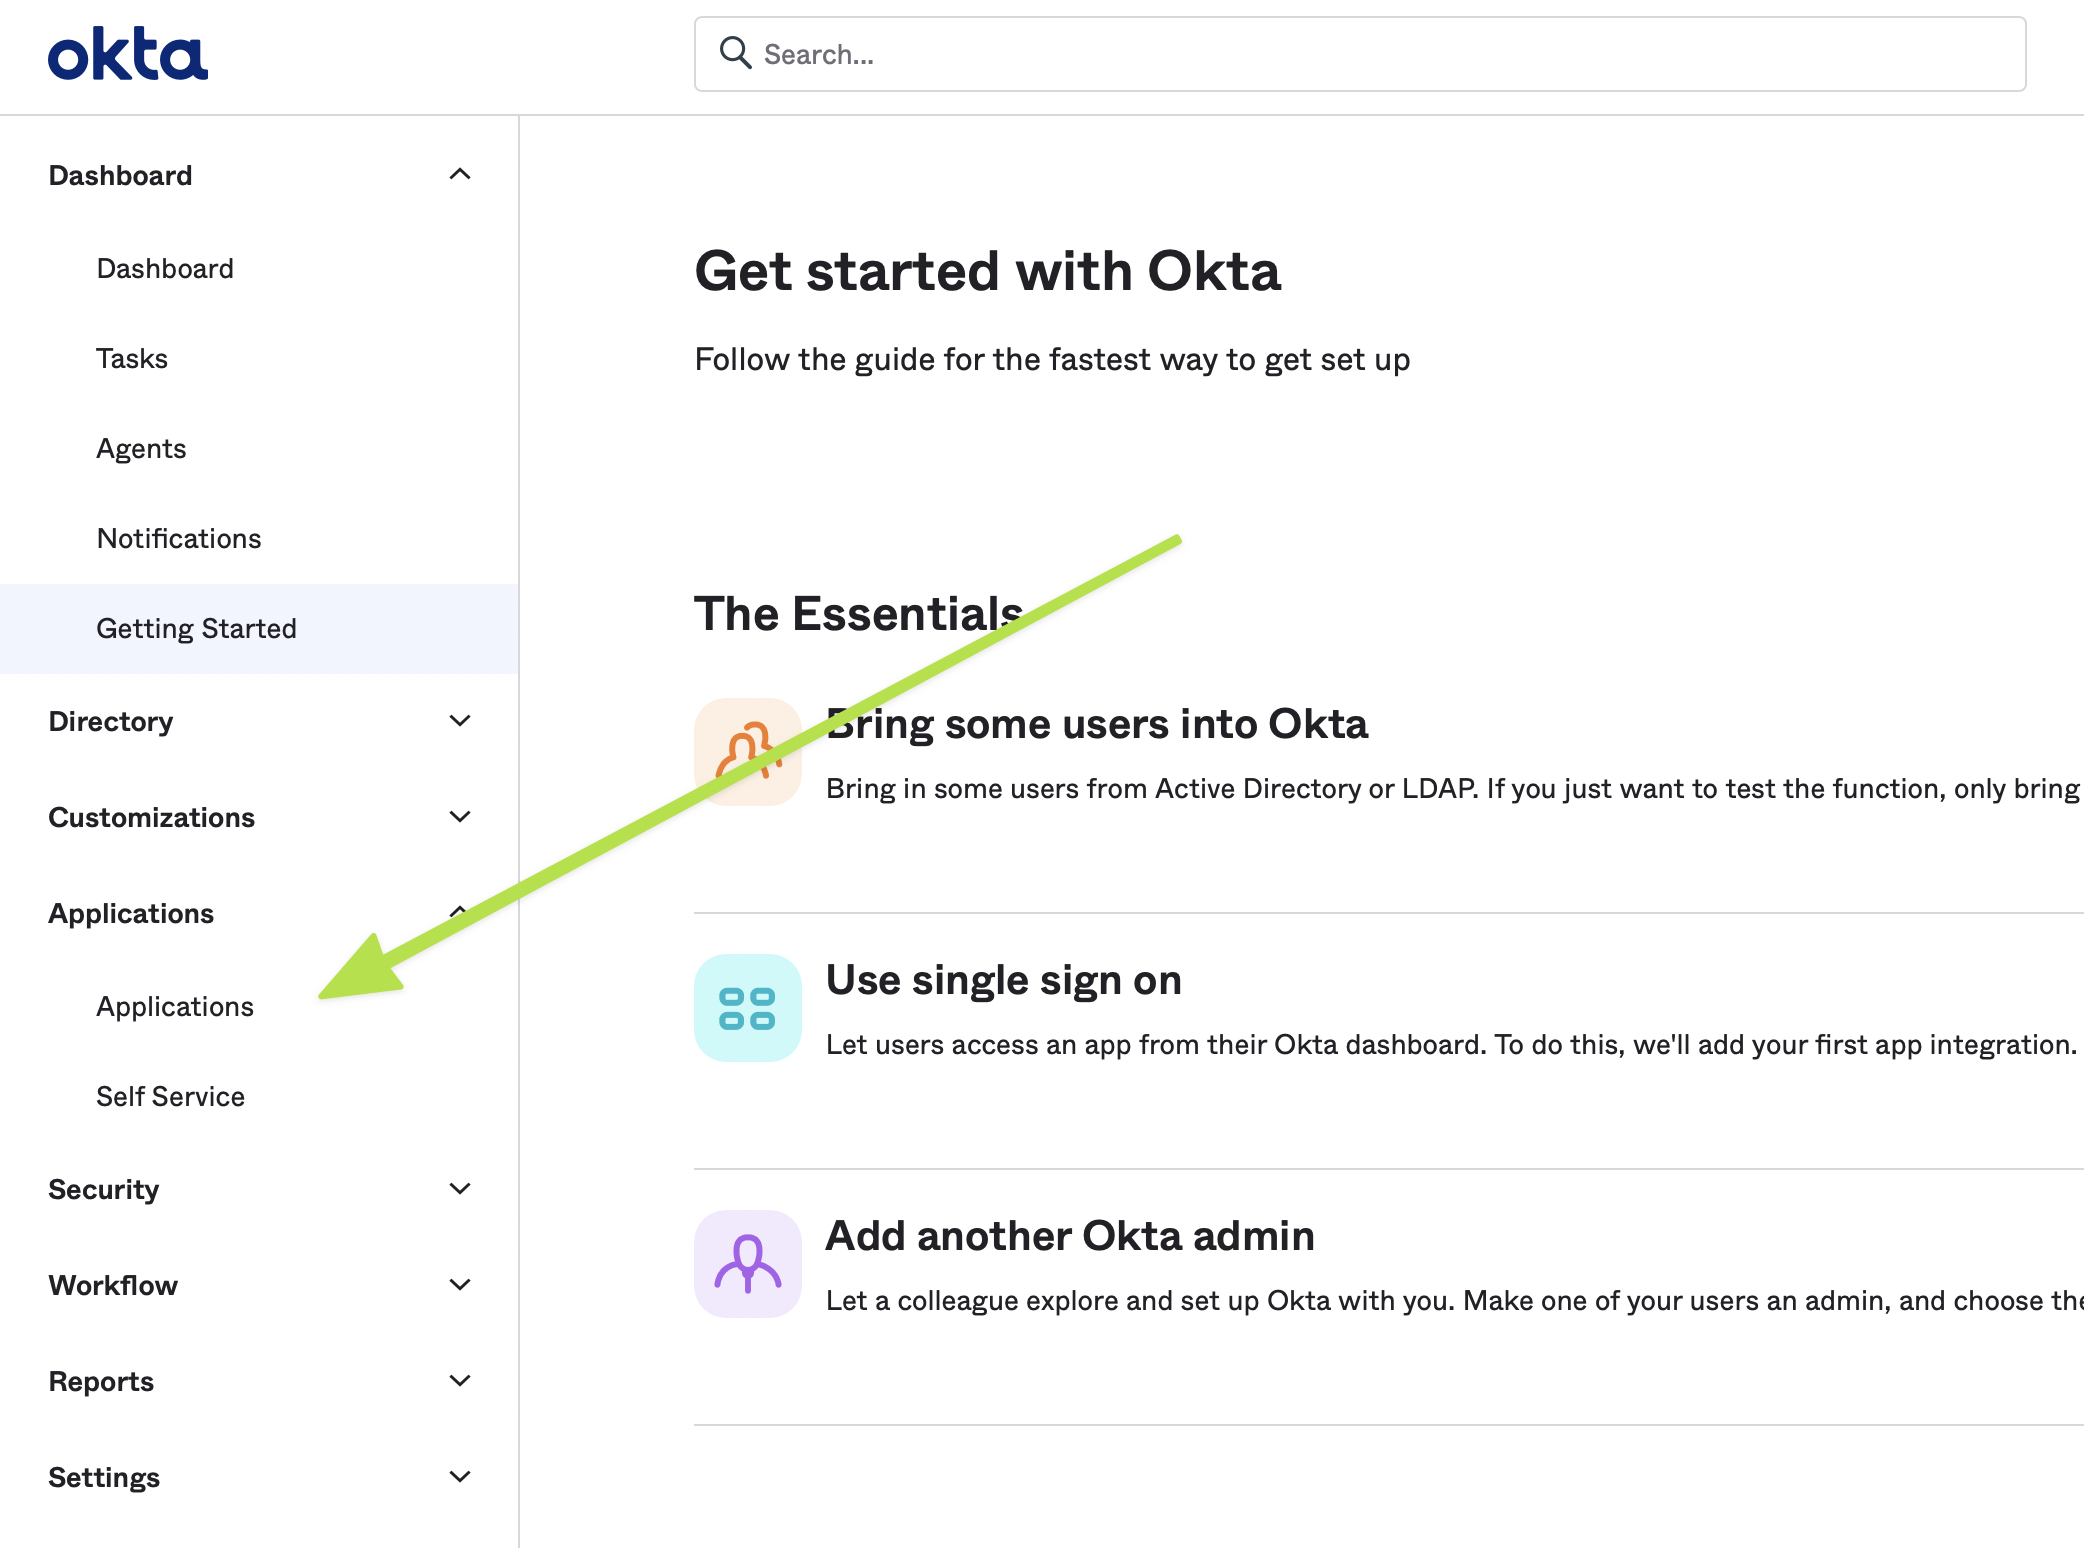
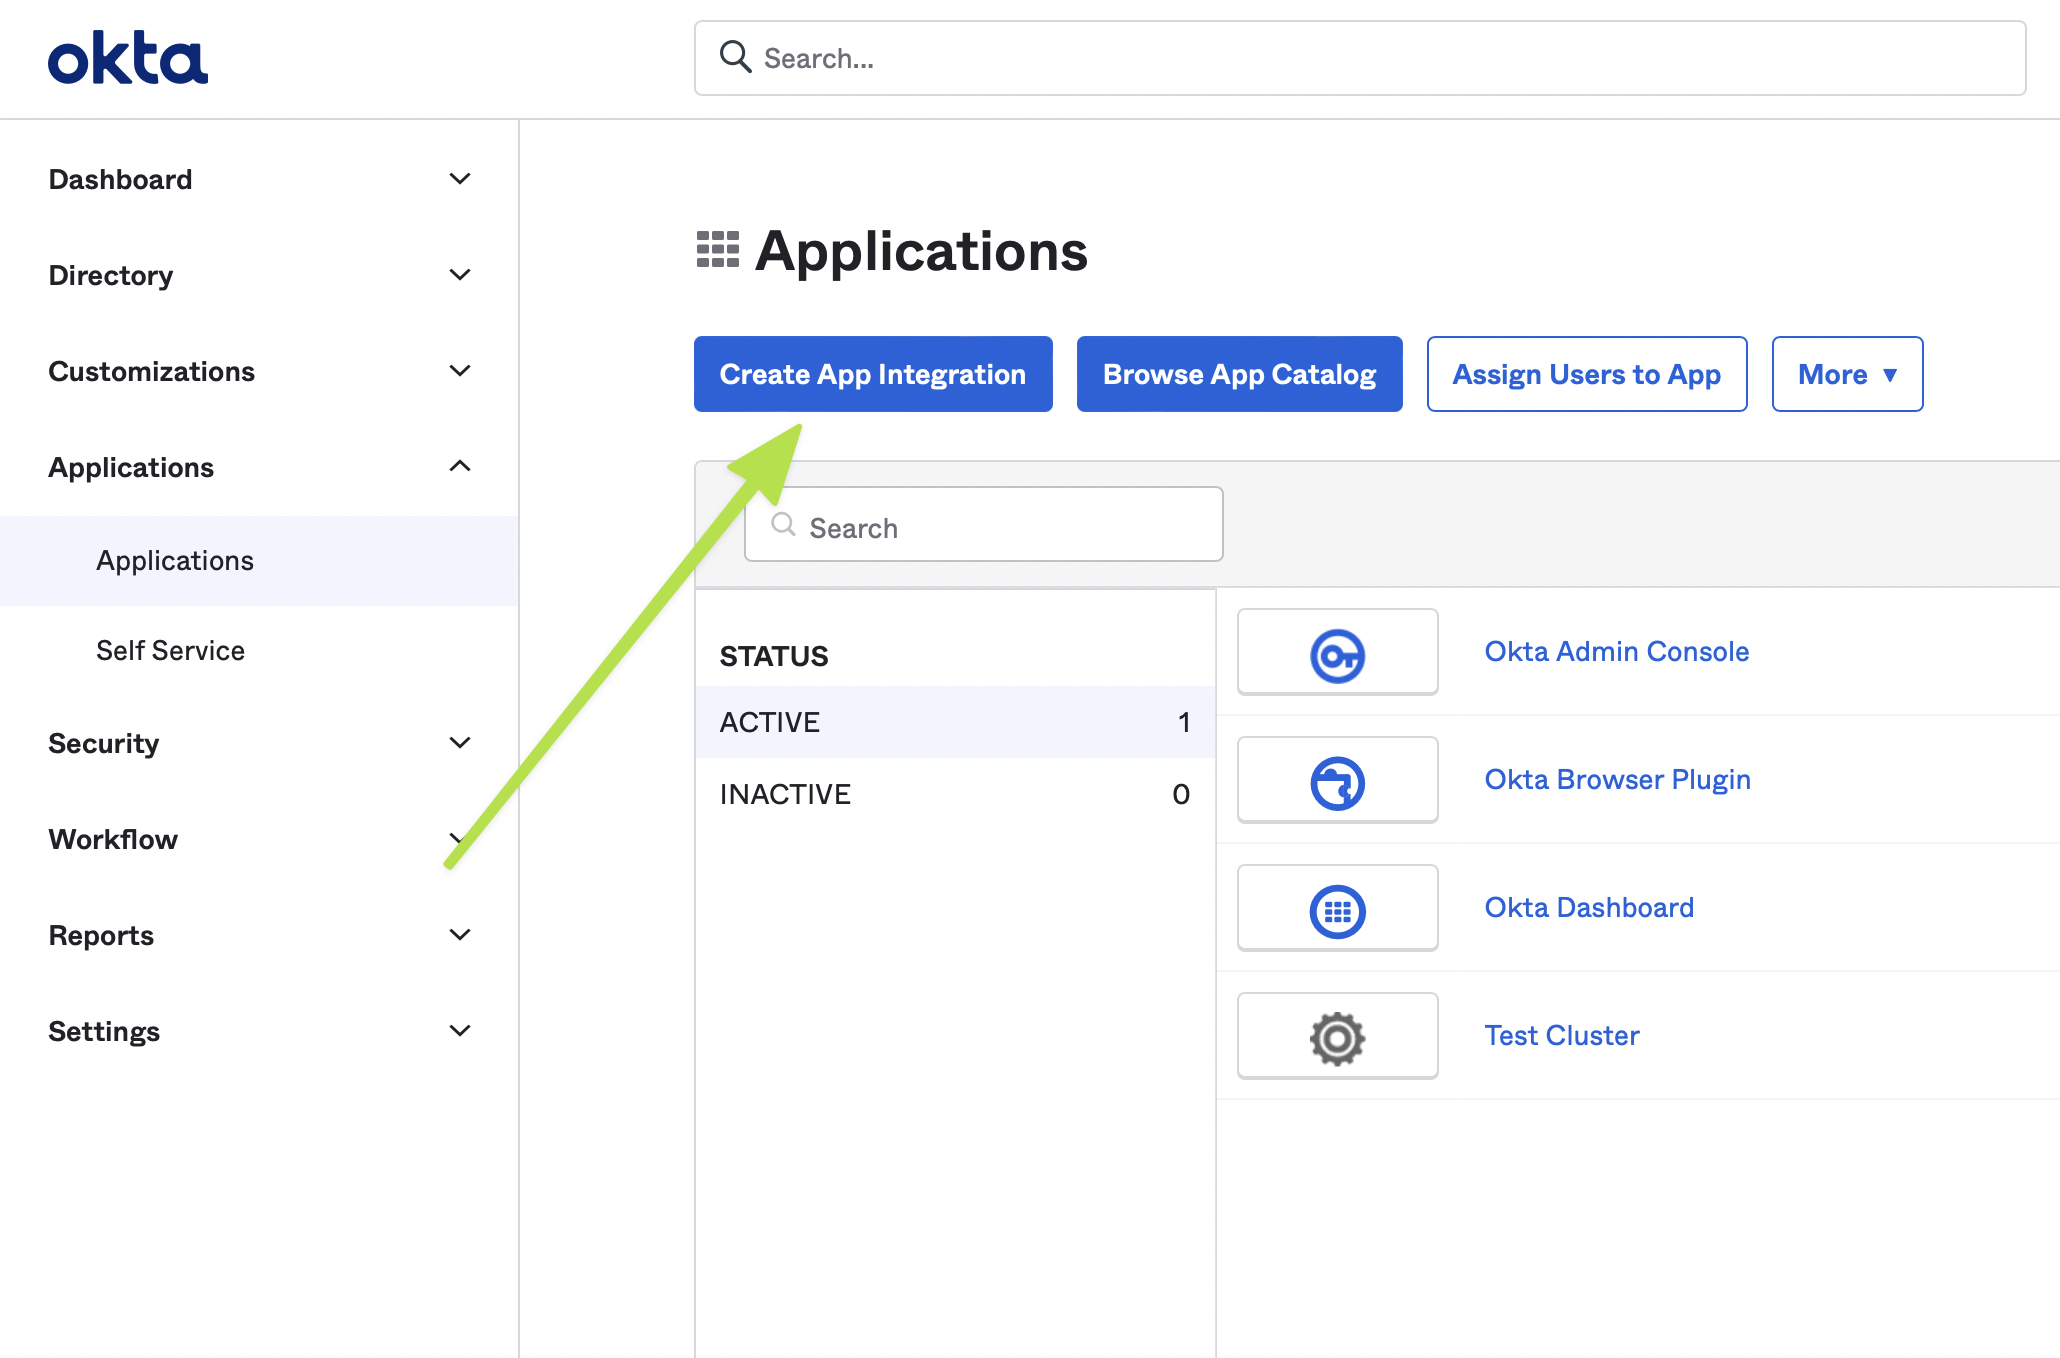
2. Go to Applications
3. Create an Integration
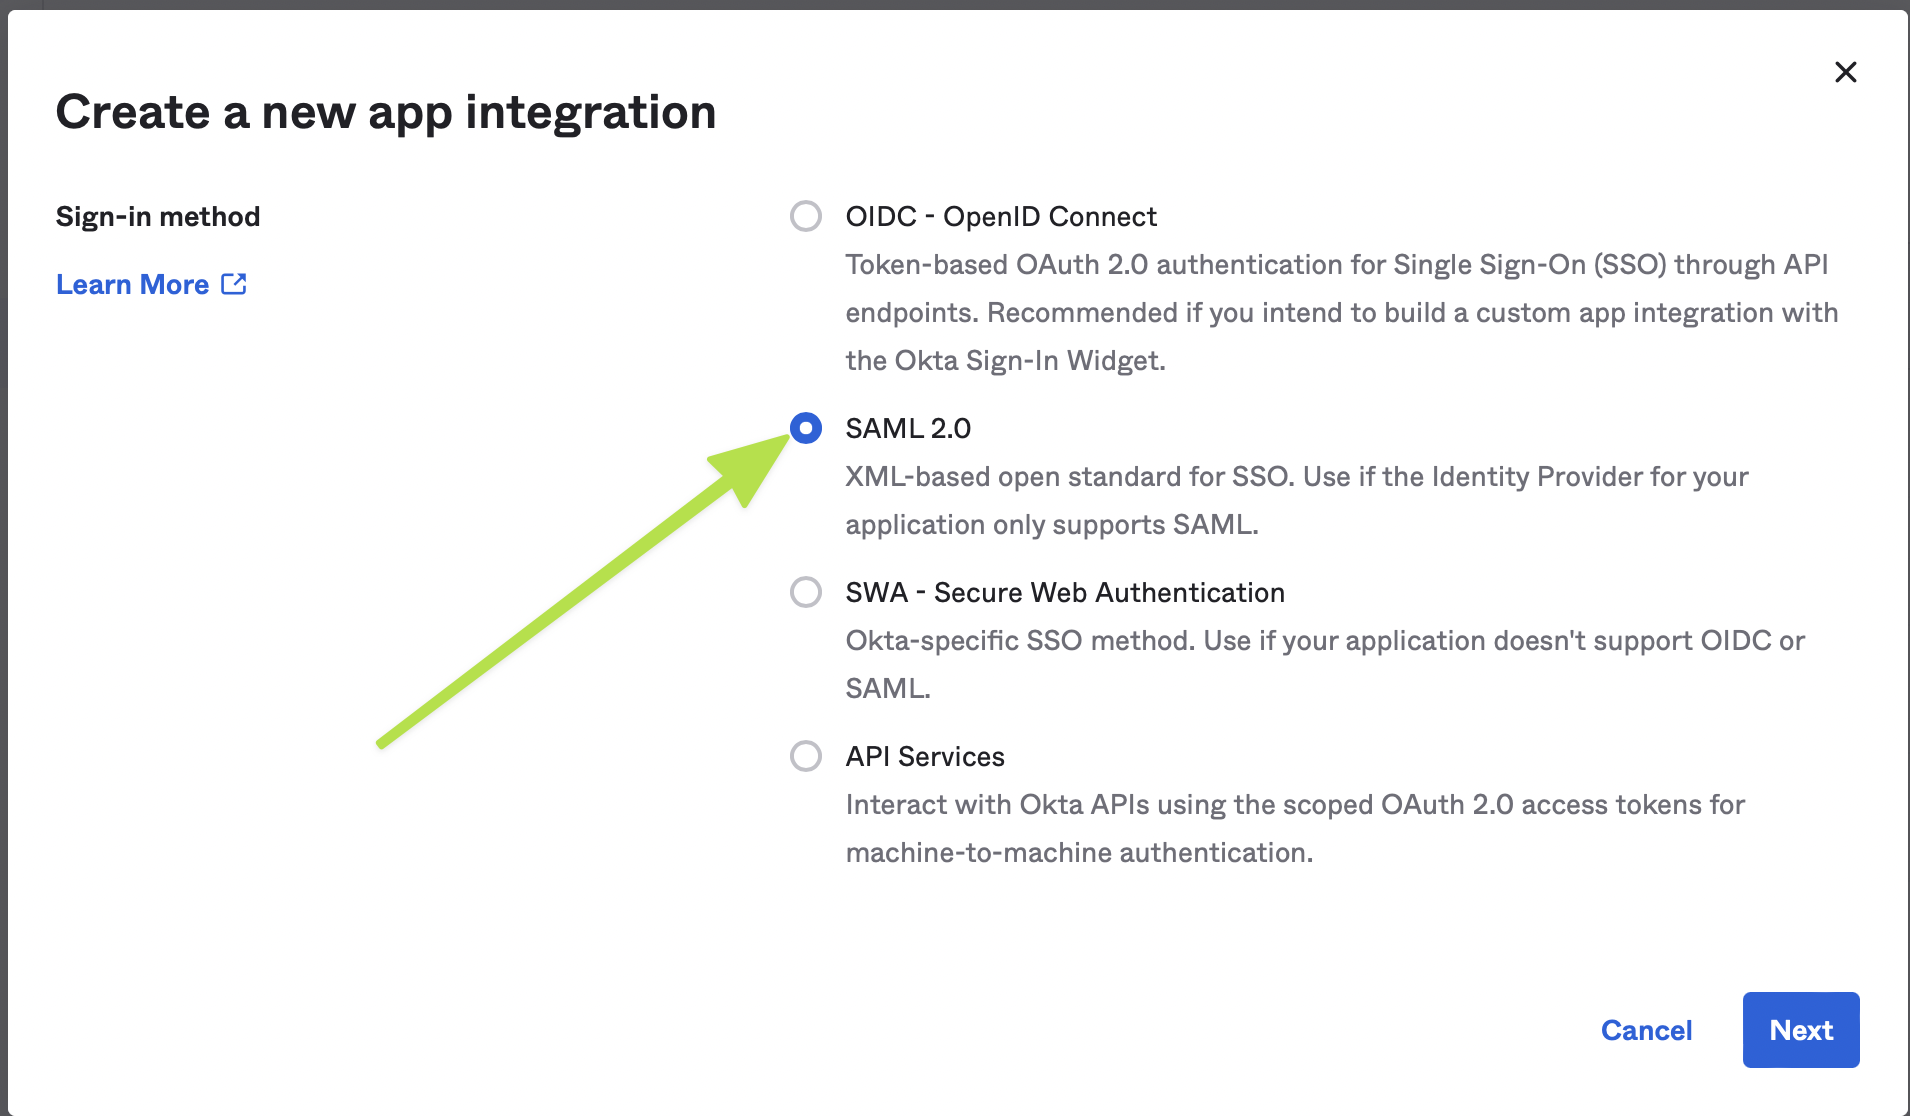
4. Select SAML 2.0
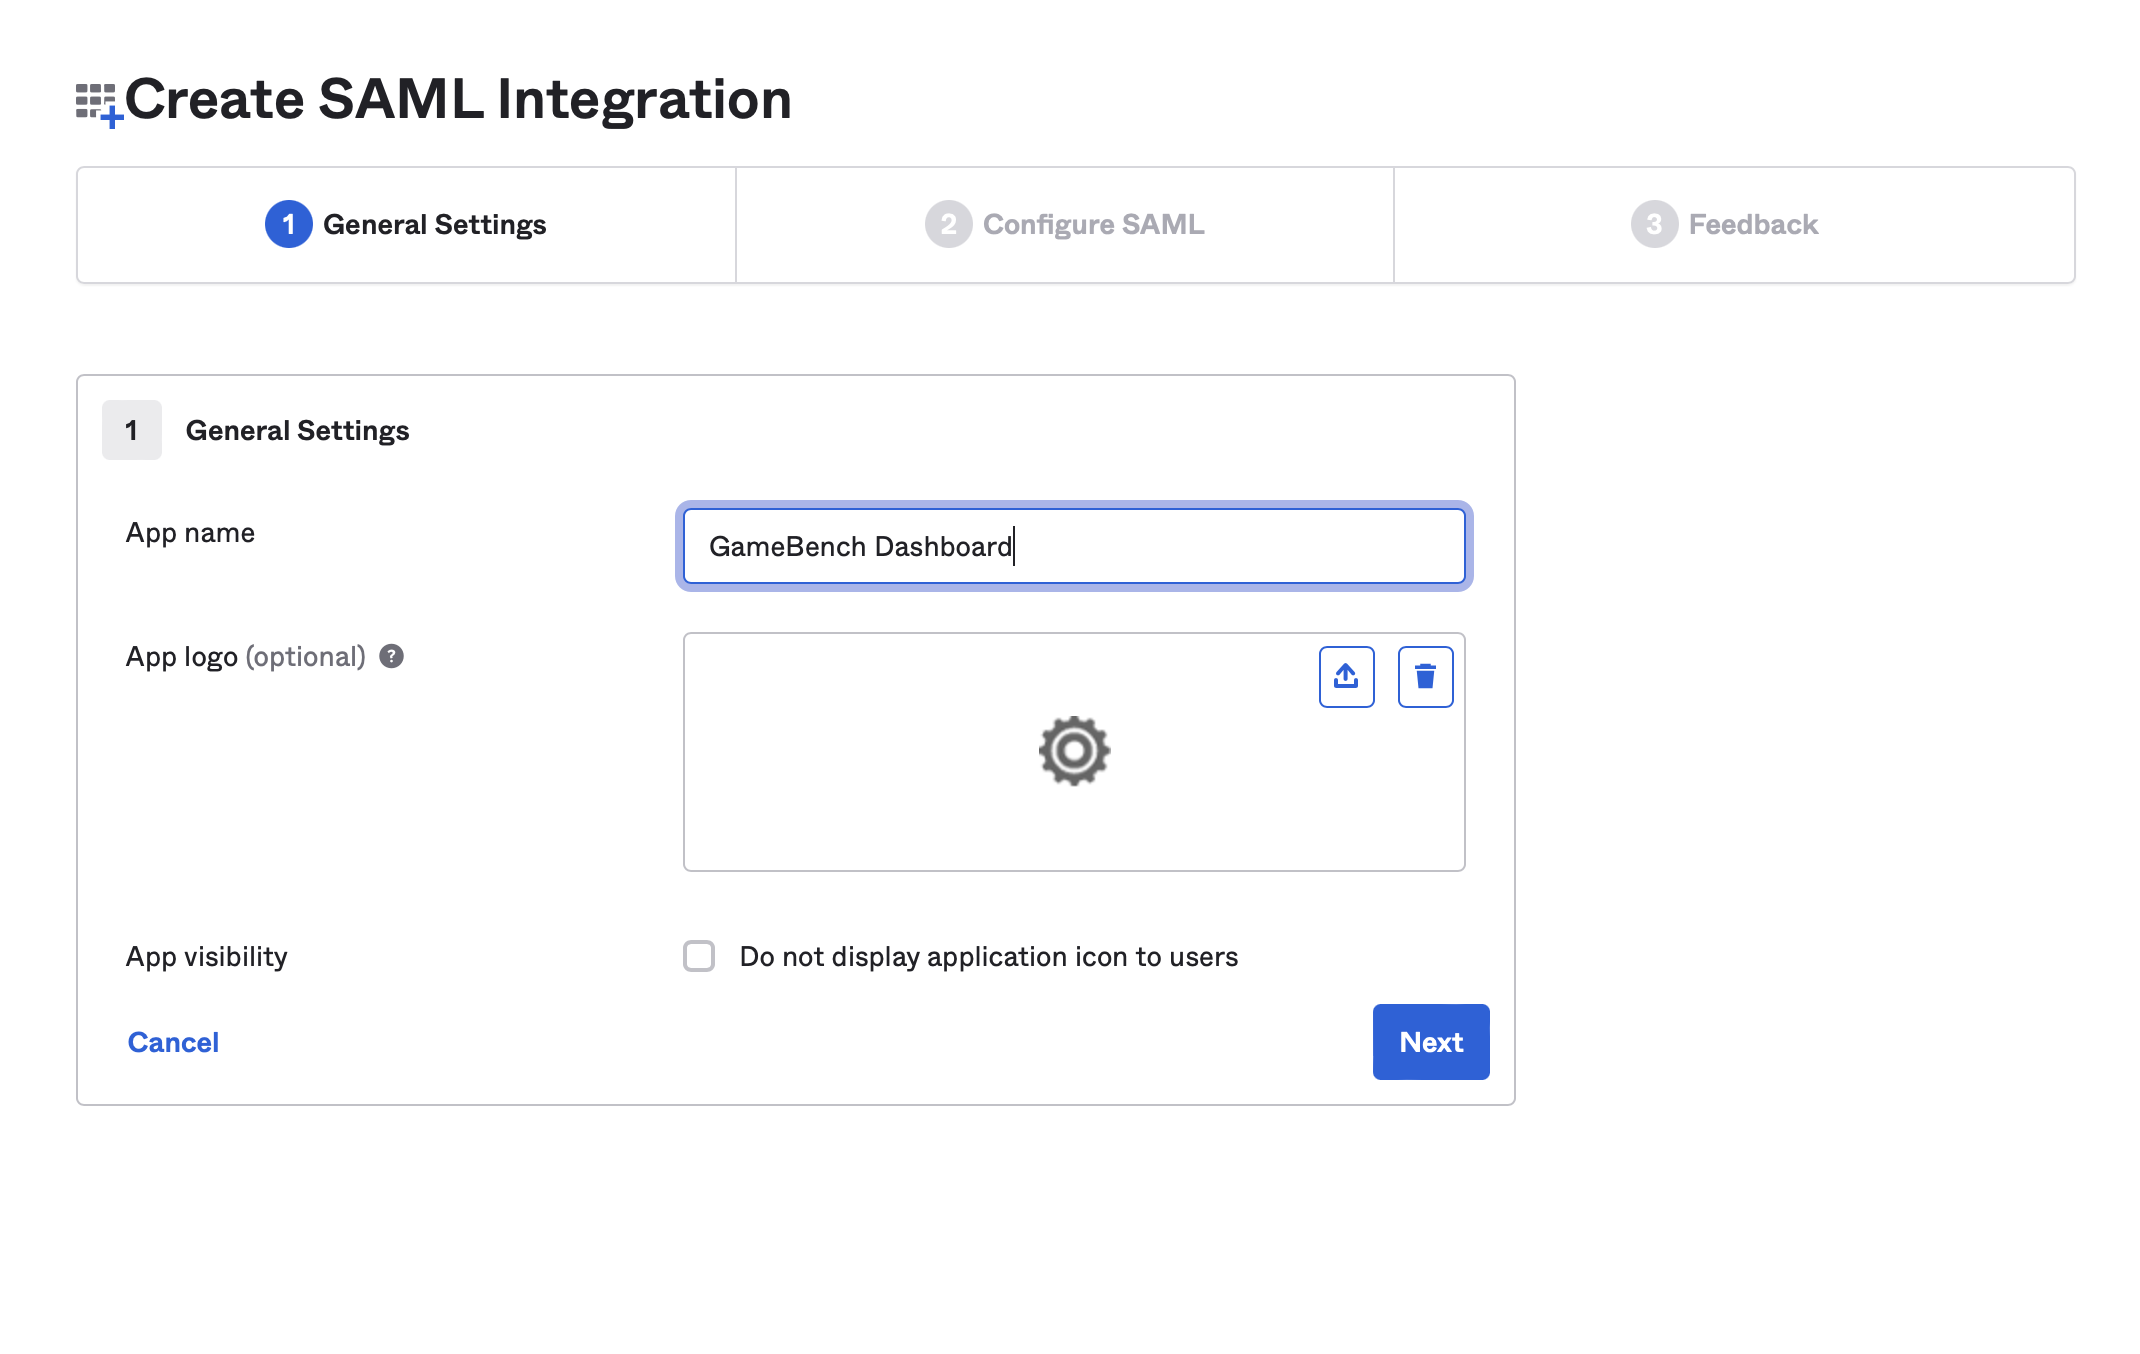
5. Set the Application Name
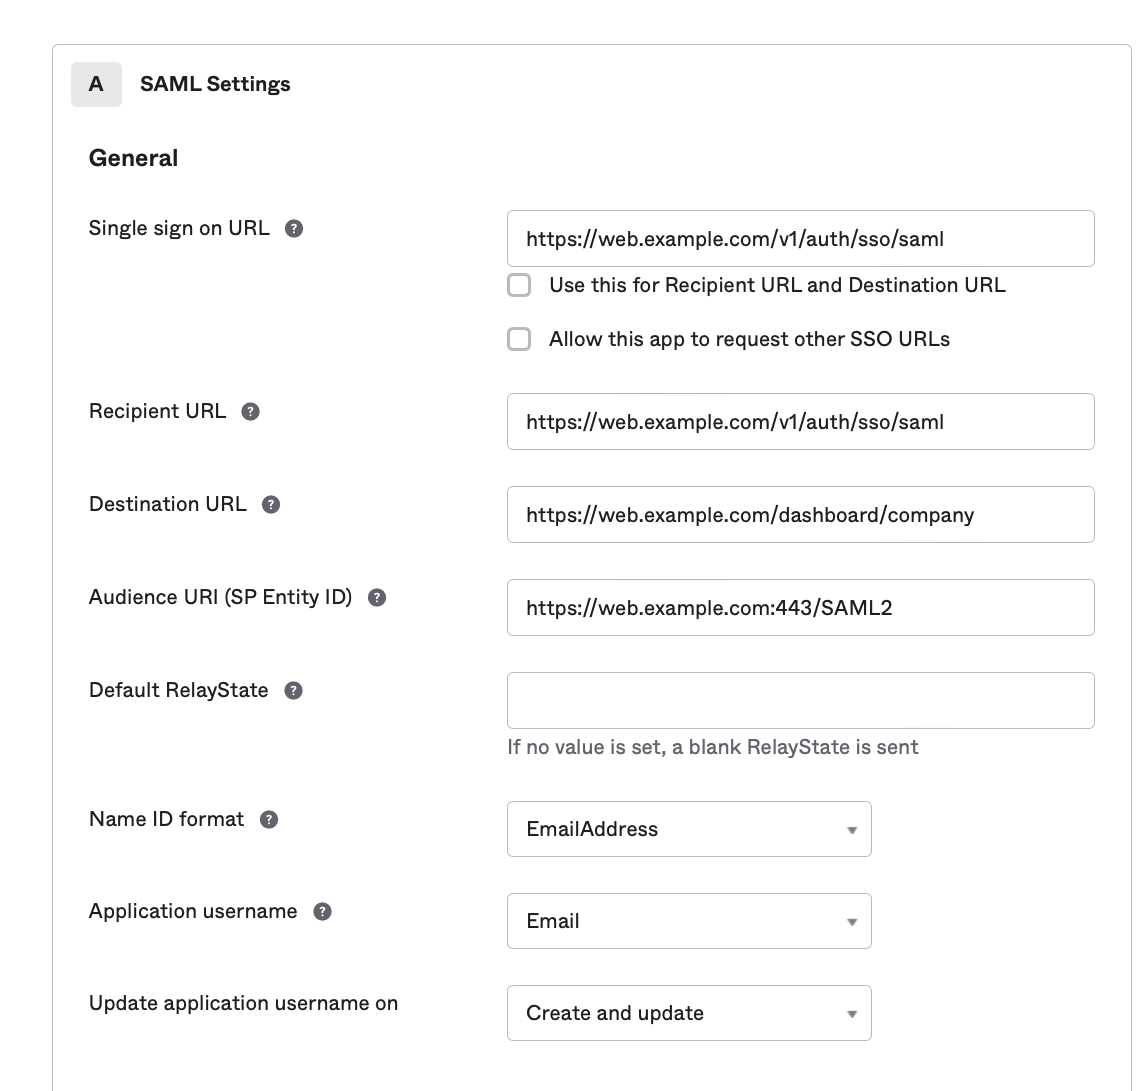
6. Update SAML Settings
Enter the Service Provider Details values from the GameBench SSO page (see table above). Make sure you uncheck the option for “Use this for the Recipient URL and Destination URL” and enter the values separately.
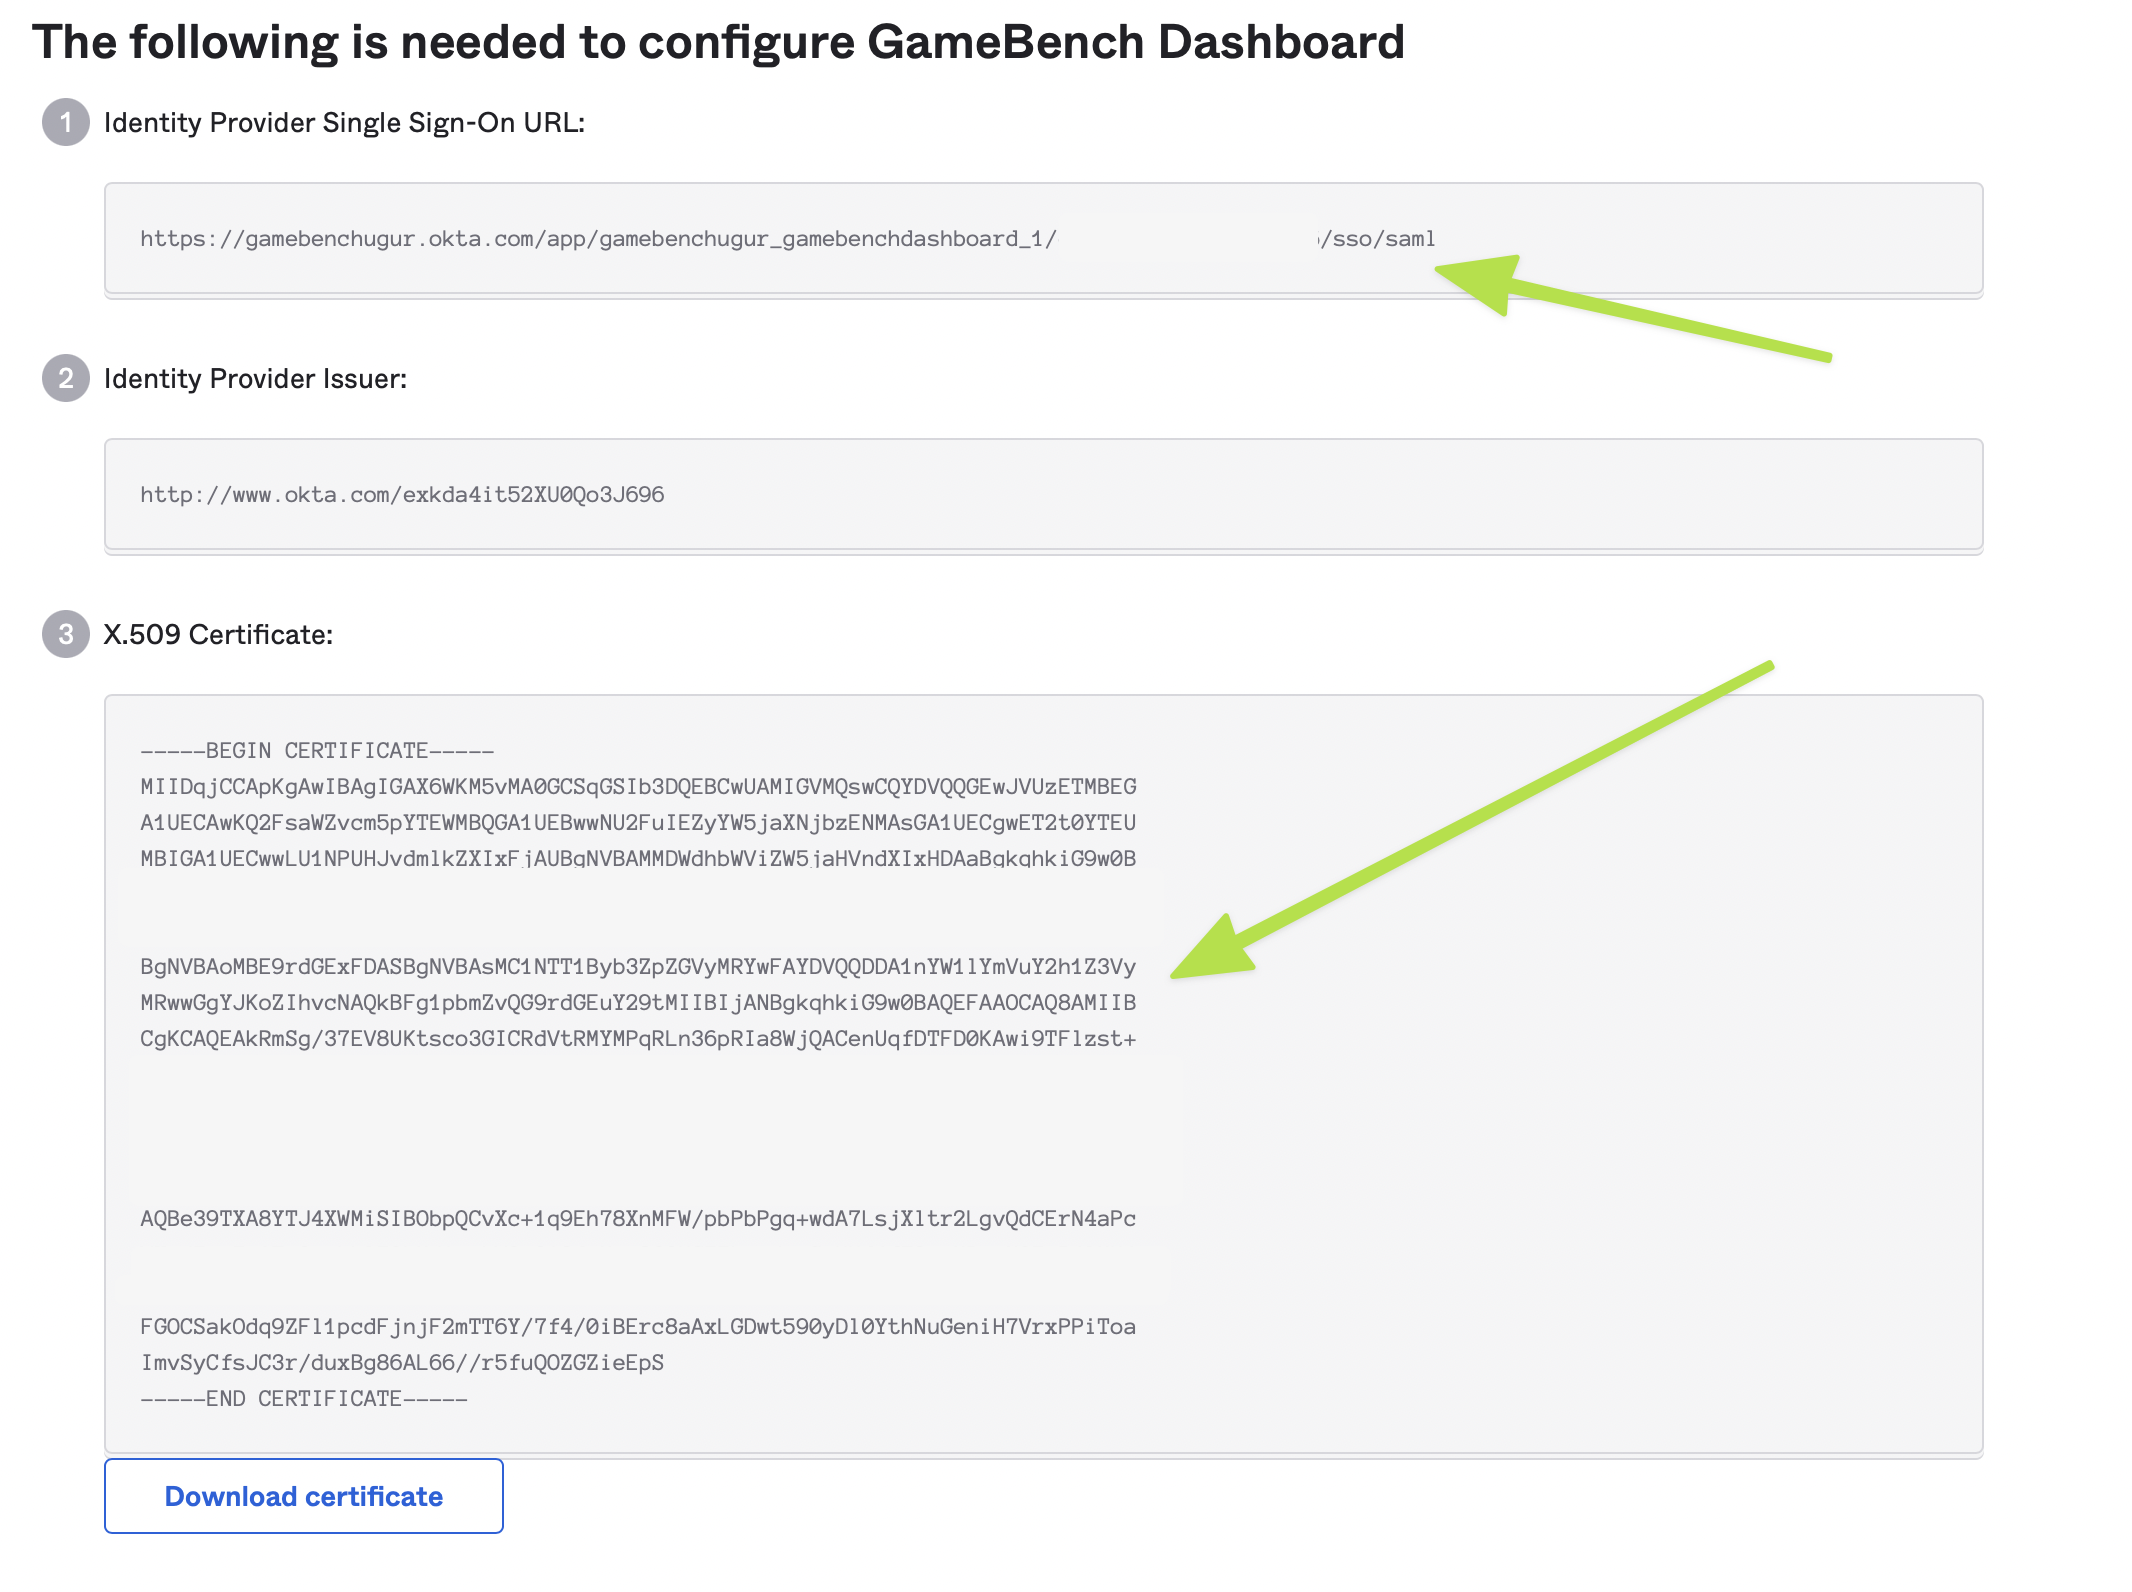
7. View Setup Instructions
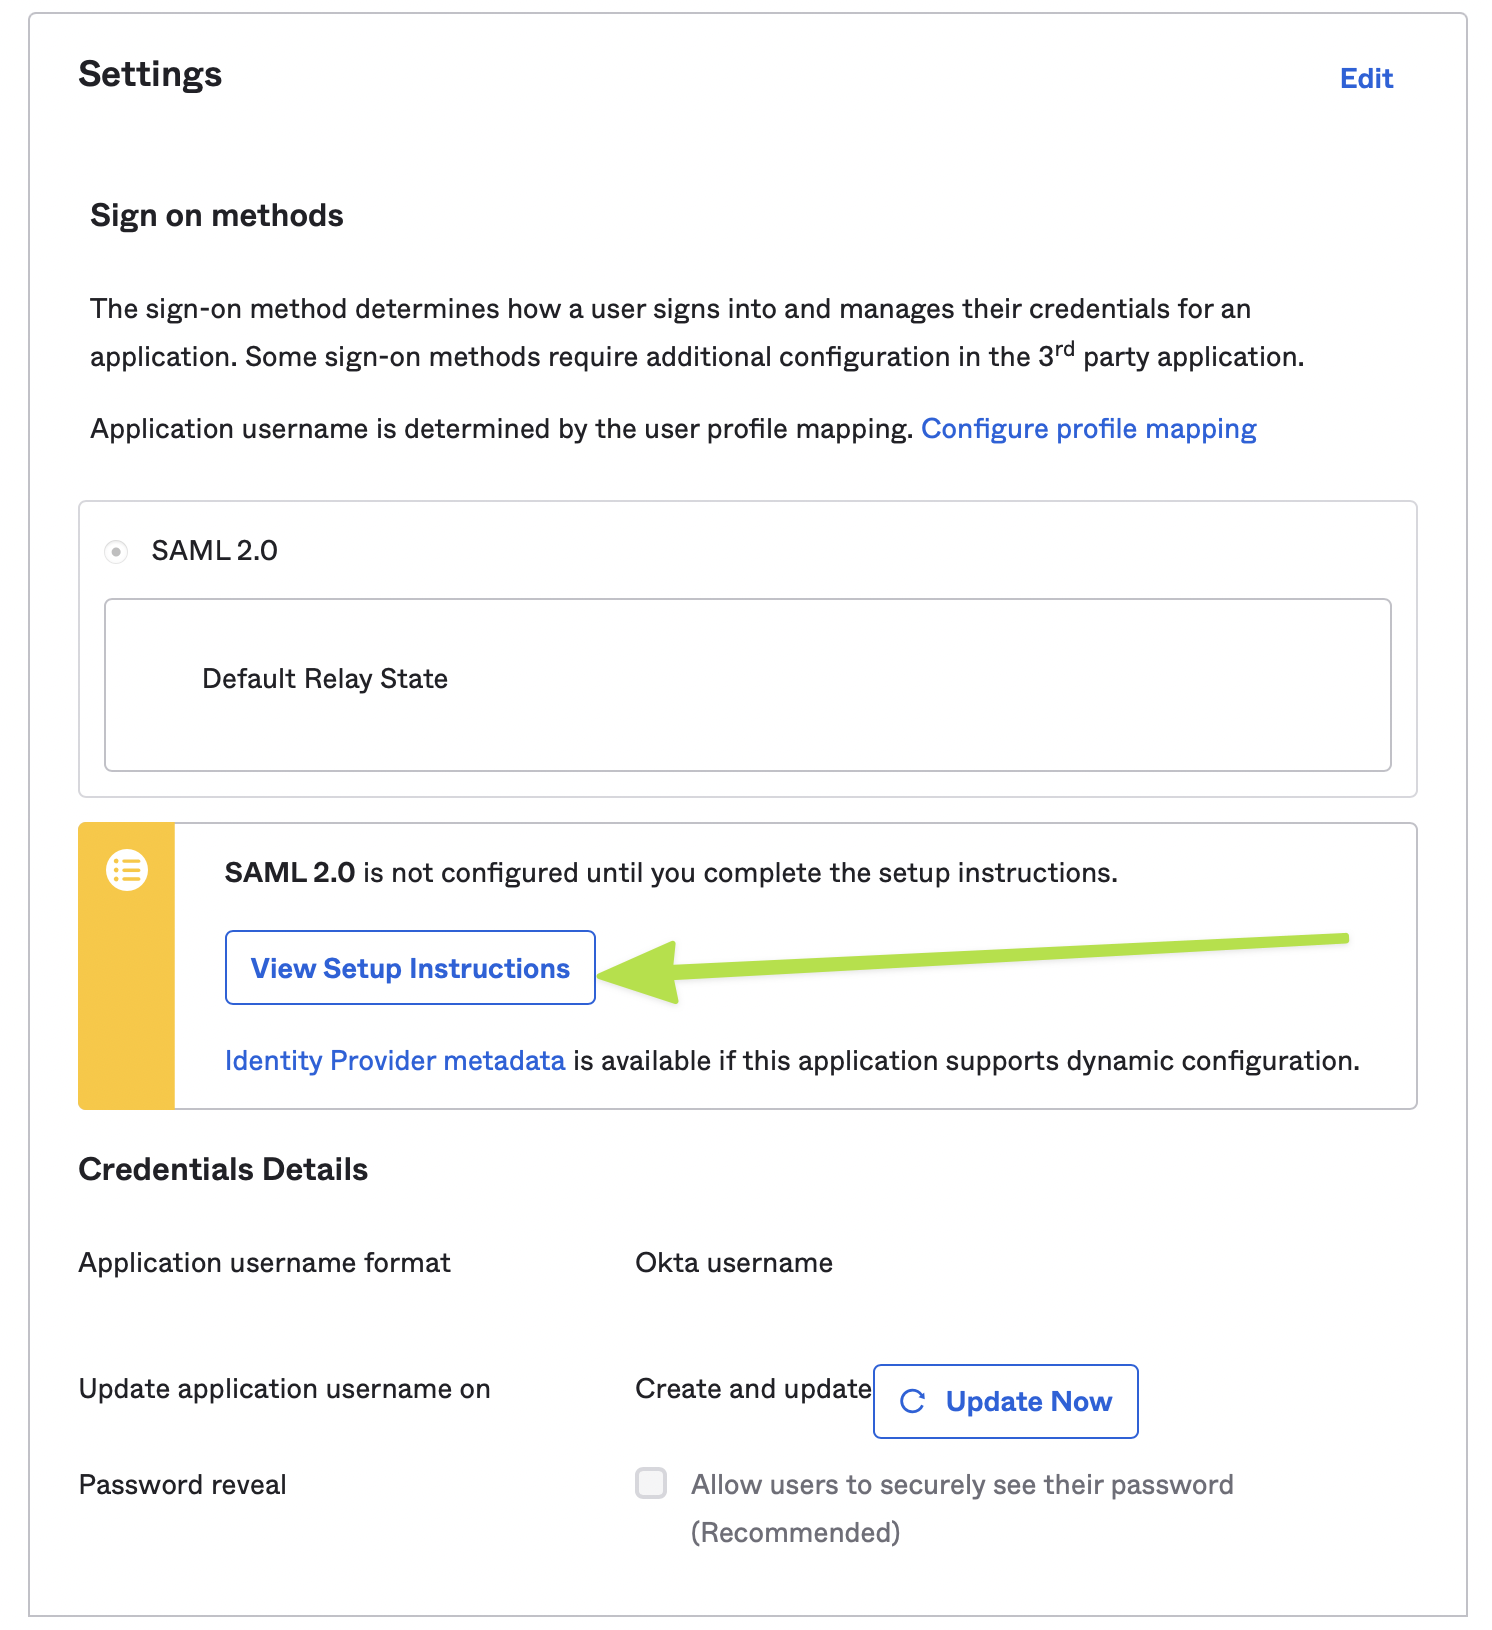
8. Copy Values to GameBench
Copy the Identity Provider Login URL and Certificate from Okta’s setup instructions into the GameBench SSO Configuration page and click Save.