Getting Started
Generating your first session
- Select which device you want to test.
- Select which app you want to test.
- Click "Record" to start profiling. (Clicking a second time will stop profiling.)

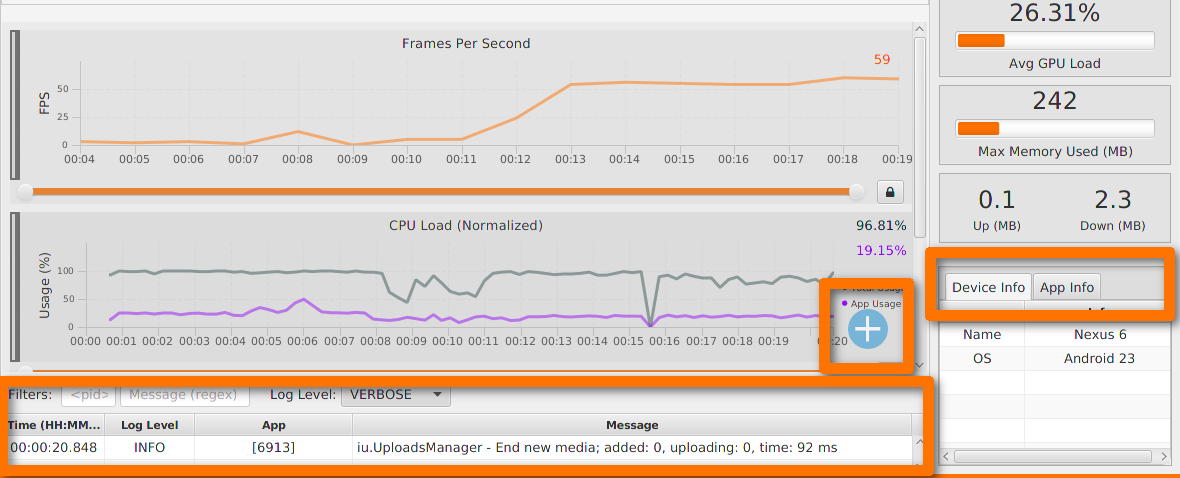
Viewing different metrics
- The central charts pane shows you frame rate, CPU Load and Memory usage in real-time.
- You can add further charts for more metrics using the "Add" button.
- The Message log at the bottom can be expanded to show what the device is working on right now.
- App and device information is shown on the bottom right.
After recording
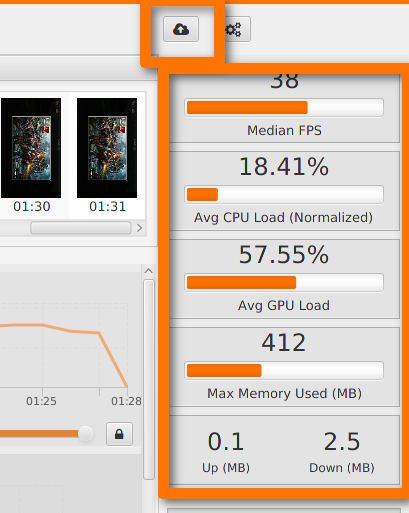
- Use the **"Cloud"** button to upload your recorded session data to your GameBench web dashboard.
- The Summary panel on the right hand side shows average performance metrics and maximum memory information for your session.
How to do a wireless session (in 5 simple steps)
A wireless session will let you capture power consumption data for iOS and Android devices.
Note: In order to perform a wireless session, the GameBench desktop app and the mobile device you want to test must be connected to the same WiFi network.
- Connect in the device you want to test to your PC.
- If you have multiple devices connected, select the one you want to test.
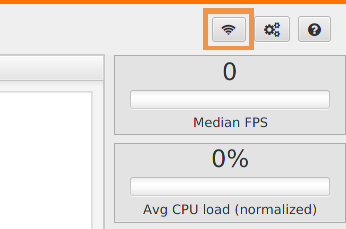
- Press the “WiFi” button, which will initiate a wireless connection between the device and the GameBench desktop app.
- You’ll get a pop-up message and the WiFi button will turn red, indicating that the desktop app is ready for wireless testing.
- Disconnect the mobile device, hit the ‘Record’ button and start testing!
How to disable wireless mode
If you have connected a device wirelessly and you now want to perform a wired test:
- Reconnect the device to your testing machine through using your USB cable.
- Select the device on the devices list.
- Press the “WiFi” button.
- If wireless mode is disabled successfully the “WiFi” button should turn grey for this device.
Last updated on